

This first mod guide is for the Stryfe, one of my favorite Nerf guns. We'll cover lock removals, voltage mods and how to make the motors decelerate faster. Let's start...
1. Preperation
Materials and tools you need:
-Nerf Stryfe
-Screwdriver
-Soldering Iron and filler metal
-Trustfire Li-Ion Rechargeable Batteries
Start by removing all 14 screws.
Open the gun and take a look at the internal mechanisms and how they work.
2. Lock removals
We'll start with this lock. It's the dart tooth, and it prevents you from pulling the trigger when no dart is in your clip. Also, with this lock, most non-Elite clips won't work with the Stryfe. So simply remove it.

This one doesn't let you pull the trigger when the acceleration trigger isn't pulled. Remove it in the following steps.


On to the next lock. This blocks the trigger if no clip is inserted. Unscrew the plate and remove the piece, the switch will be dealt with later.


3. Fast deceleration and Thermistor removal
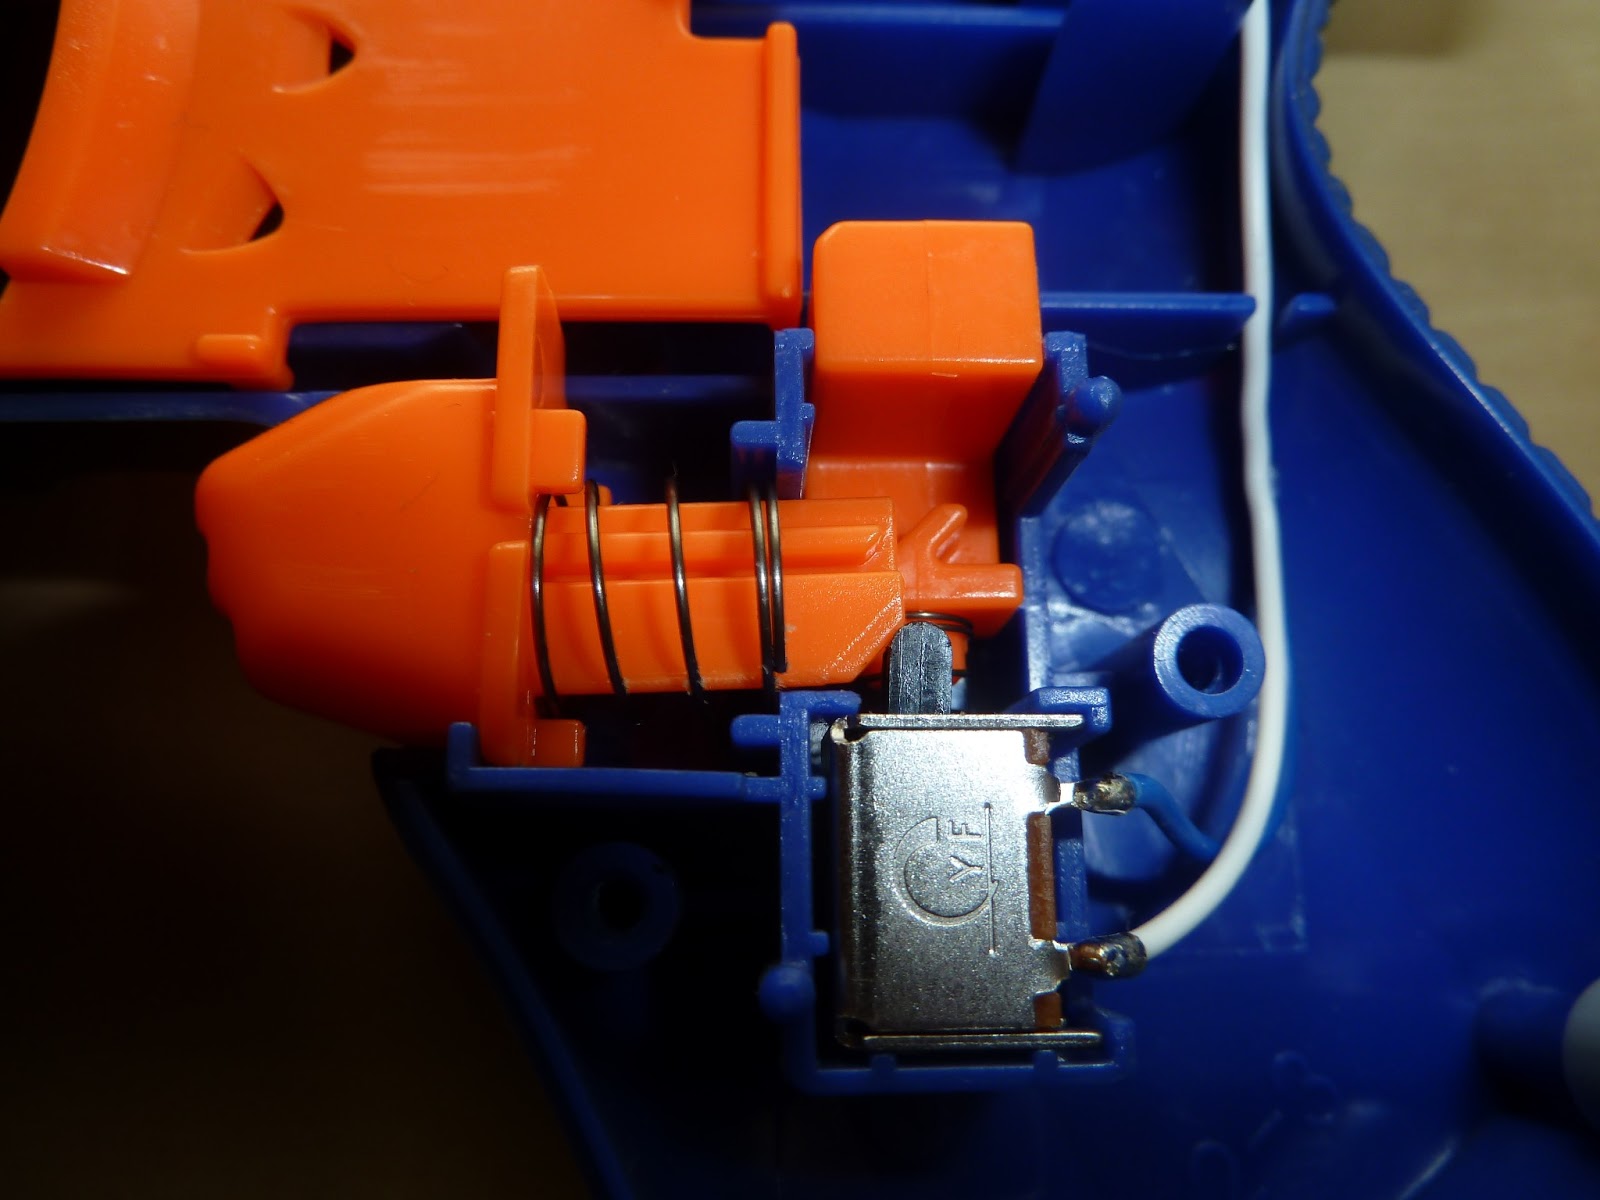
You might have noticed that by opening the jam door the motor decelerates faster. This is because the switch is directly connected to the motor. You'll need to remove the trigger for the next steps. Unscrew the 2 lower screws and remove the mechanism.

Take all switches out of place and you should end up with something like this.


Lastly, the Thermistor has to be removed. This piece doesn't let you use any higher voltage than 12V.

Unscrew and remove it, then take off the black and green cable and just solder it to the pole.

Now slowly start reassembling your internals, until you are finished. Make sure to route the cables neatly and nothing is in the trigger's way.

4. Voltage mod
This one is really easy, just open the battery tray and put in your Li-Ion Batteries. Check out my Basic Voltage modding Guide for this. I use Trustfire 14500 3.6V Lithium Ion batteries, which I get from dx.com. For the mod, I decided to only use 2 of them (8.4V) and put a cable in to bypass the other 2 slots. But now that the Thermistor has been removed, you can use any voltage.

If you've followed the steps correctly, you now have a modified Stryfe!
Are you experiencing any problems or have a question? Just drop a comment!
Nice mod!!! Now all I have to is the voltage part!
ReplyDeleteGotta get me some trustfires...
Finished and ordered some trustfires and parts to make dummy batteries. Will post results when trustfires arrive, but it appears to work great right now!
ReplyDeletehey just thought i would state the ovierse but still if you dont wanna take all the parts out for what ever reason soldering the switches with a bit of wire across the two wires works fine to :)
ReplyDeleteYou can up voltage w/ 1 9V battery and 2 AAs. Takes 2 alligator clip wires to do so unless you solder.
ReplyDeleteYou're right, I've been experimenting with 9-Volt batteries in several mods, but I think the Li-Ion hold way longer than 9V batteries.
Deletewhy do u have to connect the red to blue? Also why cant you just remove the thermoster and connect the black and green to the pole only and connect the red an blue together?
ReplyDeleteThat is also a possible solution if I understood correctly.
DeleteIn my case I connected the red to the blue cable to lengthen it, otherwise the cables were not long enough to reach the slot of the main switch.
Are you sure it can run 12 volts? I want to remove the locks only :D
ReplyDeleteThe stock motors will run really hot on 12V (that's what the thermistor was for in the first place), but if you exchange those for better ones I think it will work out.
DeleteYou guys know where to find parts?
ReplyDeleteCould you email me please?
Dennis1986@live.ca
Is there any way to bypass the thermistor without soldering because I don't have a soldering iron or solder
ReplyDeleteJust twist the two wires coming out of the thermistor together so they make contact here's a tutorial
Deletehttps://m.youtube.com/watch?v=zQqRmUO0nEg
Just twist the two wires coming out of the thermistor together so they make contact here's a tutorial
Deletehttps://m.youtube.com/watch?v=zQqRmUO0nEg
Hi have questions about the lock removals…
ReplyDeleteIf I simply open the stryfe, remove these locks, and close it, can i safely and without damage to the blaster fire?
( I read that you can jam if a dart gets stuck between the flyweaves ig im not revving(?)
please note that i have the xd version
ReplyDelete(does that make a difference?)
So I modified my desolator and did a basic mods did lock removal then I moved on to the thermistor when I was twisting it broke. Anyone know what to do?
ReplyDeletewhat a great mod, Thank you so much.
ReplyDeletewhat about the resistors below the motors? wouldnt it restrict the voltage?
ReplyDeleteIf you use Trustfires, you can trust your blaster to be on fire. Try Panasonic Eneloops. They are much safer than Trustfires, IMRs and even Lipos. Using a Lipo will provide the strongest performance, but requires a full rewire and carving out the battery tray. IMRs need a rewire for longevity and safety purposes, and don't require carving out the battery tray, but are weaker than a lipo. All of those batteries are far safer than Trustfires, which are not designed for this application. Trustfires are designed for short bursts of power. They are often used for vapes. However, even the vape community, the last people who would have safety concerns for a product, are phasing out Trustfires due to just how dangerous the batteries are.
ReplyDelete